Why Choose Stained Glass Tile Sheets for Your Project?

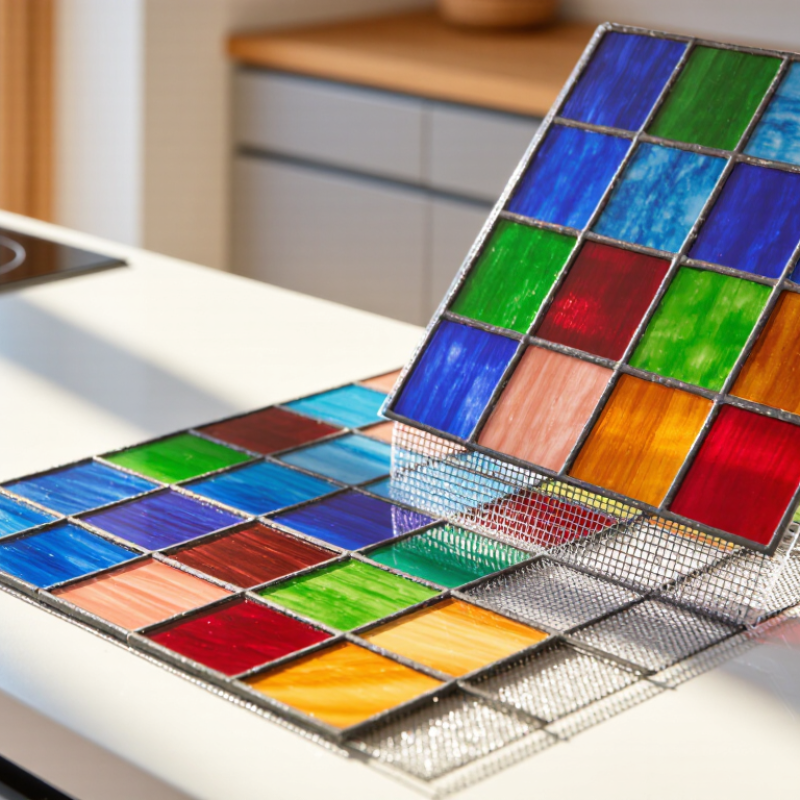
Stained Glass Tile Sheets combine luminous color, practical installation, and a strong visual identity. They can turn a plain backsplash into a surface that catches morning light like a small mosaic window. For homeowners, designers, and contractors, this format offers more control than individually placed glass pieces. Sheets arrive with tiles mounted on mesh or another backing, helping maintain consistent spacing and reduce installation time.

Market evidence also supports interest in decorative tile materials. Grand View Research’s ceramic tiles market analysis identifies continued growth in renovation, interior design, and residential construction demand. Fortune Business Insights similarly reports expansion across the global tiles market, driven partly by aesthetic upgrades and durable surface finishes. These reports group several tile categories together, however. They do not measure stained glass products alone. That limitation matters when evaluating supplier claims.

Performance still requires careful judgment. Glass tiles resist moisture and clean easily, making them suitable for kitchens, bathrooms, and selected feature walls. Yet glossy surfaces can reveal uneven substrates, adhesive marks, or poor alignment. I have found that sample testing is more reliable than trusting photographs alone. Check color variation under daylight and warm indoor lighting. Confirm mesh quality, sheet dimensions, edge finishing, and recommended adhesive compatibility. The U.S. Green Building Council also emphasizes documented product information through LEED material transparency pathways. That does not automatically make every product sustainable. Responsible selection depends on verified specifications, installation conditions, and expected maintenance. Stained Glass Tile Sheets can be beautiful and efficient, but only when design ambition meets technical discipline.
Why Choose Stained Glass Tile Sheets for Your Project?

What Are Stained Glass Tile Sheets?

Stained glass tile sheets are flexible mosaic panels made from small pieces of colored or translucent glass. The pieces are usually attached to mesh, paper, or a removable film. This backing keeps the pattern aligned during installation. Unlike ordinary ceramic tiles, stained glass can catch daylight and create subtle shifts in color. A blue sheet may appear cooler near a window and deeper under warm lighting. The surface is often glossy, textured, or slightly uneven.

These sheets suit backsplashes, shower accents, fireplace surrounds, and decorative wall sections. Their smaller pieces can follow gentle curves more easily than large tiles. However, glass reveals installation mistakes quickly. An uneven wall may create visible shadows beneath the sheet. I have found that dry-fitting each panel helps prevent awkward joints and broken patterns. Use a suitable setting material, confirm the surface is stable, and follow the tile and adhesive specifications. Cutting also requires care because chipped edges may remain visible.

Tips: Inspect every sheet before installation. Check color variation under the project’s actual lighting. Keep the grout joints consistent. A small gap can become surprisingly noticeable. For wet areas, seal surrounding materials properly and confirm the complete installation system is rated for moisture. I sometimes prefer ordering a little extra material, although exact color matching is not guaranteed later.


Why Choose Stained Glass Tile Sheets?

Stained glass tile sheets are small glass mosaics mounted on a flexible mesh or paper backing. The pre-arranged sheets simplify installation, help maintain consistent spacing, and provide efficient coverage for backsplashes, shower walls, accents, and craft projects.

How to read the chart: Coverage is calculated from the nominal sheet dimensions shown. Actual product sizes may vary slightly because of mounting gaps, edge cuts, and manufacturer specifications.

How Stained Glass Tile Sheets Are Made

Why Choose Stained Glass Tile Sheets for Your Project?

Stained glass tile sheets begin with carefully selected glass, not ordinary wall paint. Manufacturers sort sheets by color, thickness, texture, and thermal behavior. The glass is then cut into small pieces using controlled scoring tools. Some designs use kiln-fused glass, while others use cast glass or laminated pieces. Heat softens the glass and bonds the layers together. Cooling must happen slowly. Otherwise, internal stress can cause cracks later.

A mesh backing holds the finished pieces in a stable sheet. This improves alignment during installation, especially across wide walls. Quality teams inspect edges, color consistency, bonding strength, and surface defects. However, variation is unavoidable. Handmade-looking textures may differ between batches. The U.S. Environmental Protection Agency’s 2020 Facts and Figures report recorded a 25.7% recycling rate for glass containers in 2018. That figure does not represent tile production, but it shows why recycled glass remains relevant. Production methods still require careful cleaning and controlled melting.

Tips: Ask for a sample sheet before ordering. Check how light changes the color. Confirm that the adhesive suits glass and the installation area. Use flexible grout where movement may occur. I would not assume every glass tile tolerates outdoor temperature changes. Manufacturer testing and local installation experience matter more than appearance alone.

What Benefits Do They Offer for Design Projects?

Stained glass tile sheets give design projects immediate color, depth, and reflected light. In a small bathroom, blue-green pieces can make daylight shimmer across a plain wall. Sheet backing also keeps individual tiles aligned, reducing layout time and uneven spacing. The 2024 Houzz U.S. Bathroom Trends Study reported that 84% of renovating homeowners upgraded their showers or surrounds. That demand makes durable, water-resistant wall finishes increasingly practical.

These sheets support many design directions. Designers can frame a niche, soften a kitchen backsplash, or create a narrow color band around a vanity. Their translucent surfaces can also make compact rooms feel brighter. The National Kitchen & Bath Association’s 2024 Design Trends Report identifies layered materials and personalized details as continuing priorities. Stained glass tile fits both preferences without requiring a complicated pattern. Grout color matters more than many homeowners expect.

Installation still needs care. I would not call these sheets effortless. Uneven walls can create visible ripples, and aggressive cutting may chip the glass. A qualified installer should check the substrate, select compatible mortar, and seal porous grout correctly. The Tile Council of North America recommends following tested installation systems for glass tile, especially in wet areas.

One practical concern is visual repetition; using only one sheet pattern can look flat. Mixing two scales or adding a matte tile usually creates better contrast. My earlier enthusiasm needs one correction: reflective tile cannot replace good lighting, and too much shine may feel cold.

How to Choose the Right Tile Sheets

How to Choose the Right Tile Sheets

Choosing stained glass tile sheets requires more than matching colors. Start with the installation location, lighting, moisture, and cleaning habits. A bathroom wall can accept glossy glass, but a shower floor needs a slip-resistant surface. ANSI A326.3 identifies 0.42 as the minimum wet DCOF value for many level interior floor applications. Confirm the manufacturer’s tested rating before placing glass sheets underfoot.

Check the sheet construction closely. Mesh-mounted sheets usually create faster installation, yet uneven mesh can cause visible dips between tiles. Hold a sample against the wall and inspect the joints from several angles. Small tiles suit curved surfaces better, while larger modules reduce grout lines and visual noise. For wet areas, follow the Tile Council of North America Handbook and use a waterproofing system beneath the tile assembly. Glass also expands differently from some substrates, so flexible, compatible mortar matters.

Measure twice.

Color deserves a practical test. Blue glass may appear green beside warm lighting, and metallic backing can exaggerate reflections. Request physical samples, not only screen images. ASTM C373 classifies porcelain by water absorption, but glass tile needs product-specific absorption and installation data. Do not assume every glass sheet is suitable for floors or steam rooms. I have seen attractive samples fail beside dark grout. A lighter grout often softens the handmade look, although it may demand more maintenance. My own selection process is not flawless; mock-ups sometimes reveal problems that drawings hide.

How to Install and Maintain Them

Glass tile sheets can brighten a wall, but careful installation determines whether the surface stays attractive. Begin with a flat, clean, dry substrate. Dust, grease, or uneven plaster can create visible bumps beneath translucent tiles. Measure the area and arrange the sheets on the floor before applying mortar. This simple step reveals awkward edges and prevents rushed cuts.

Use a white, glass-compatible thin-set mortar. Dark mortar may change the tile’s color. Spread it with the recommended notched trowel, then flatten the ridges slightly to reduce shadows. Press each sheet gently with a grout float. Do not push too hard. The mesh can shift, and small gaps may appear between tiles. A wet saw with a diamond blade usually gives cleaner cuts, though even careful cuts can chip delicate edges. That part needs patience.

Allow the mortar to cure according to its instructions before grouting. Choose grout suitable for the joint width and tile surface, then remove residue before it hardens. I would test a small hidden area first; some glass finishes show haze more easily than expected. For maintenance, use warm water, a soft cloth, and a pH-neutral cleaner. Avoid abrasive powders, harsh acids, and rough scrubbers. Check corners and grout lines occasionally, especially near sinks or showers. Repairing a small crack early is easier than removing an entire sheet later. Good ventilation also limits soap film and persistent moisture.

Why Choose Stained Glass Tile Sheets for Your Project? - How to Install and Maintain Them

Evaluation Area Typical Information Project Benefit or Requirement
Material Decorative glass pieces mounted on a mesh-backed sheet The sheet format helps align many small pieces and can reduce installation time compared with setting each tile individually.
Common Sheet Size Approximately 300 × 300 mm (12 × 12 in), although sizes vary by product A standard sheet size makes layout planning and quantity calculations more convenient.
Typical Tile Thickness Commonly about 4–8 mm; verify the product specification before installation Thickness affects transition height, trim selection, adhesive coverage, and the finished surface level.
Suitable Indoor Uses Backsplashes, shower walls, bathroom walls, feature walls, niches, and decorative borders Glass provides a reflective surface that can add color, light, and visual depth to interior spaces.
Wet-Area Consideration Use only where the tile, adhesive, grout, substrate, and waterproofing system are approved for wet conditions The tile itself may resist water, but joints and the wall assembly still require correct waterproofing and sealing details.
Outdoor or Freeze-Thaw Use Confirm that the specific sheet, adhesive, grout, and installation system are rated for exterior and freeze-thaw exposure Not every glass tile sheet is suitable for outdoor conditions, temperature changes, or prolonged moisture exposure.
Substrate Preparation The surface should be clean, dry, firm, flat, and free of dust, grease, loose paint, and structural movement A stable and even substrate improves bond strength and helps prevent uneven joints or cracked tiles.
Recommended Adhesive A compatible white thin-set mortar or glass-tile adhesive, selected according to the tile and installation environment White adhesive can help preserve the appearance of translucent or light-colored glass; always follow the product instructions.
Recommended Trowel Often a small notched trowel, such as 3–6 mm, depending on tile size and adhesive requirements The correct notch helps achieve consistent coverage without forcing excessive adhesive through the joints.
Dry Layout Arrange sheets before spreading adhesive and check color variation, pattern alignment, borders, and cut locations Planning reduces visible pattern breaks and minimizes unnecessary cutting or material waste.
Installation Method Spread adhesive in small workable sections, press each sheet evenly, and use a grout float or beating block for alignment Working in small areas helps prevent the adhesive from skinning over before the sheets are embedded.
Joint Alignment Match the spacing between sheets to the spacing between individual tiles Consistent joints make the sheets appear more like a continuous tiled surface.
Cutting Use a glass-rated tile cutter or wet saw; wear eye protection and follow safe cutting practices Proper tools help produce cleaner edges and reduce the risk of chipping or breakage.
Grouting Apply compatible grout after the adhesive has cured, then remove residue with a damp sponge The grout supports the tile edges and helps protect joints from moisture and dirt.
Movement Joints Maintain perimeter and change-of-plane joints; fill them with an appropriate flexible sealant rather than rigid grout Flexible joints accommodate minor movement and can help reduce cracking at corners and transitions.
Initial Curing Allow the adhesive and grout to cure for the periods stated in their instructions before heavy cleaning or water exposure Premature use can weaken the bond, disturb joints, or leave permanent surface residue.
Routine Cleaning Use a soft cloth or non-abrasive sponge with warm water and a pH-neutral cleaner Regular gentle cleaning removes soap film and surface dirt without dulling or scratching the glass.
Cleaning Products to Avoid Avoid abrasive powders, steel wool, harsh solvents, and highly acidic or alkaline products unless specifically approved Aggressive chemicals or abrasive tools may damage grout, sealants, decorative coatings, or the surrounding finish.
Maintenance Frequency Wipe regularly; inspect grout and flexible sealant periodically, especially in wet areas Early attention to stained grout, gaps, or failed sealant can help prevent moisture-related damage.
Material Planning Measure the installation area and add approximately 10% for cuts, fitting, and possible breakage; use a higher allowance for complex layouts Ordering a reasonable reserve helps maintain consistent color and pattern if replacement pieces are needed later.